The dining room chairs were covered in red, pizzeria-type vinyl. Very easy to wipe off. Very bright bright bright tomato red..
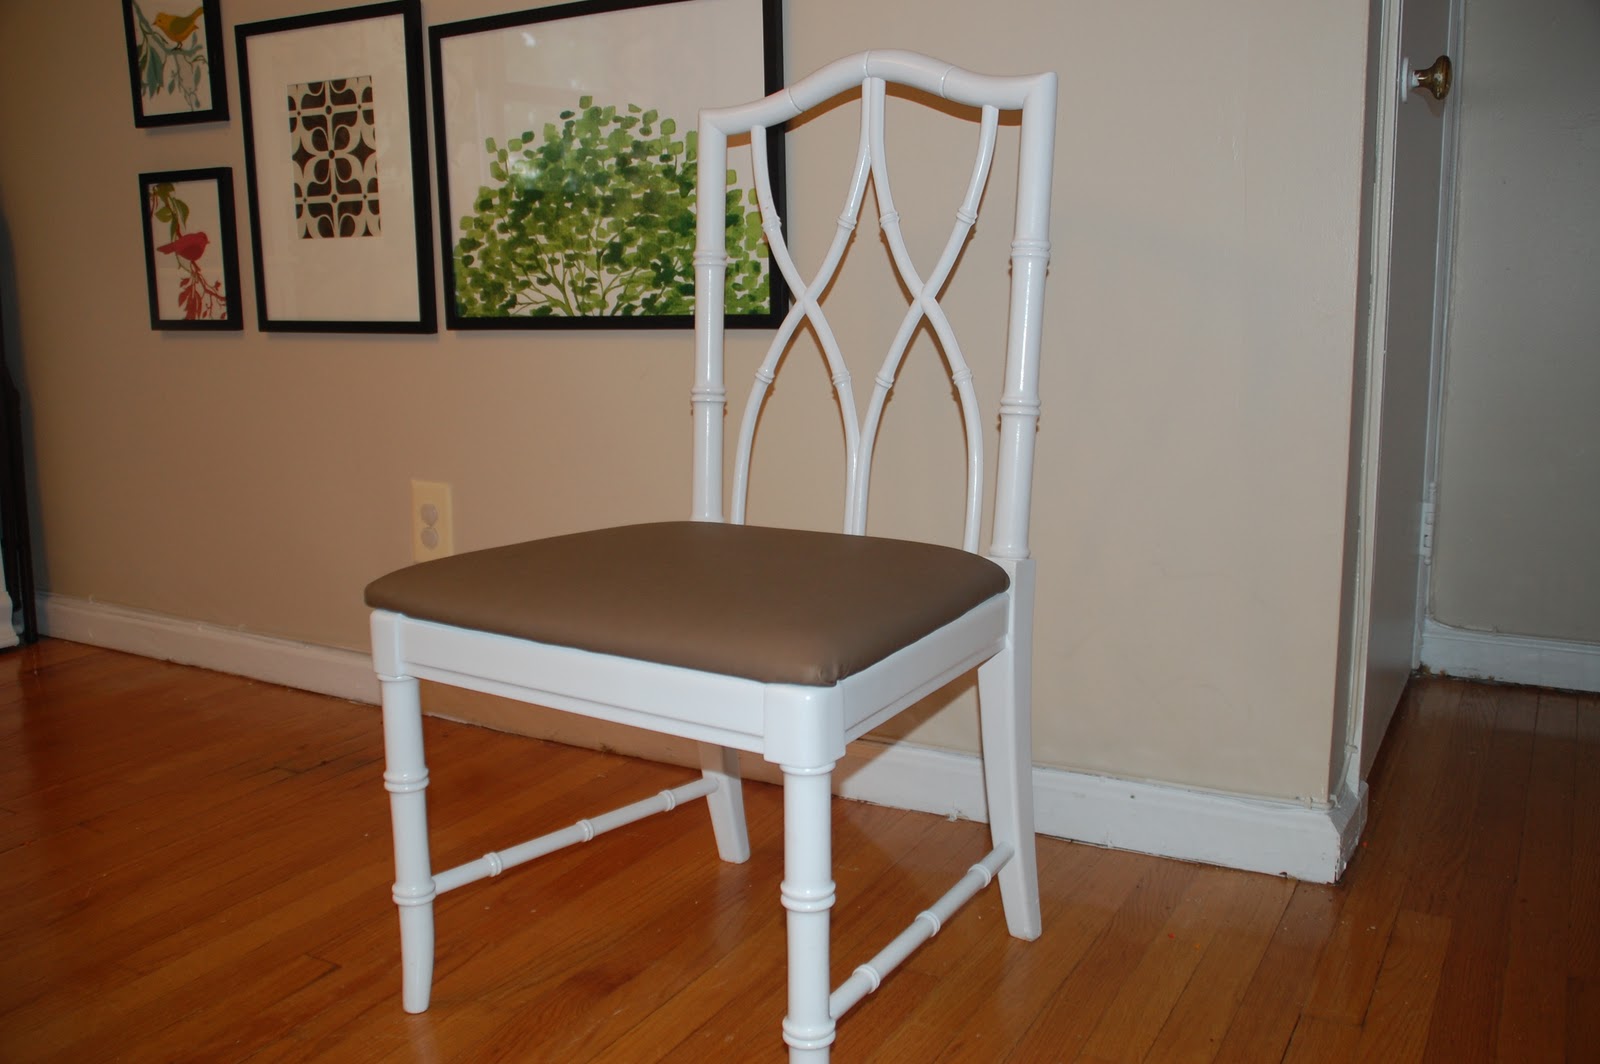
Last weekend I bought some new vinyl for the dining chairs in cappucino brown.
So pretty!
Of course, there's always something....I bought a vinyl that was matte, not shiny/repellant....and so the chairs are already stained, 24 hours in.
Le sigh.
Showing posts with label dining chairs. Show all posts
Wednesday, October 20, 2010
Friday, August 20, 2010
These chairs are going out to the curb.
I am an idiot.
Case in point:
I've had these chairs for years now; they belonged to our old dining set. I've painted the rest and they live in various places around the house, like our foyer.
Previously, these chairs looked like this:
then they were pale blue with a greek key fabric, but apparently I didn't take a picture of them.
then I changed the seat cushion to the Robert Allan Kiki Pinata fabric I used in the bookshelves on the other side of the room.
Unfortunately, the blue wasn't quite the color I wanted. I really wanted red, but someone was tired of painting, wanted to return the paint sprayer to the store, and sweet-talked me into leaving them the blue color because they looked so lovely. I grumpily acquiesced.
They did look lovely. Just not the lovely that I wanted.
So a few weeks later I grabbed some Killz primer, spraypainted it on, and then started painting them red. The primer bubbled and was very rough, and even though I sanded it down it could still be seen through the red.
I came up with the bright idea of stripping all eleventy-billion layers of paint off the chairs.
I will pause, while you all laugh at me.
I didn't want to use harsh caustic chemicals, so I did some research on the interwebs and found Citrustrip, which is a goopy neon orange paint stripper that doesn't smell. I will admit that it goes on nice and thick, not runny, and there is very little harsh chemical fumes. I put some on the chairs and then left it to do its magic. After about an hour, I came back out and started stripping.
Eh. It was coming off, but kind of slowly. I added another layer of Citrustrip, and left it out for a few hours.
Btw, I did this out on our back patio, which is a fenced in area on top of the garage, which get blazing hot sunlight all day long, with no shade.
That's right, I baked the Citrustrip right onto my chairs. Completely dried, clumpy, dusty layer of chemical peeler, completely adhered to my chairs.
See all that orangy crap? That's the dried out citrustrip.
I put them in the garage for a while. I was sick of working on them.
I decided last week that since I wasn't going to get my eleventy-billion things on my list done before the babysitter goes back to school, I would make the chairs my one project to complete. How to fix these things? I have zero desire to try and strip them again. I'll try sanding them.
I start sanding the chair. The baked on Citrustrip sands off into a dusty, flaky chemical mess. I'm sure this is great for my lungs. Worse, however, I realize, is that the little tiny edge detailing and the curviness of the chair means that the hand sander is way too large for the job. I can buy a dremel or a pointy sander or do it by hand.
And so, I am giving up on these chairs. They are going out to the curb. I is done. I am beyond sick of painting these chairs, since they take for-EVAH to do the shield. Done! Begone! Out damned spot!
Let the fun shopping of new chairs begin!
Case in point:
I've had these chairs for years now; they belonged to our old dining set. I've painted the rest and they live in various places around the house, like our foyer.
Previously, these chairs looked like this:
then they were pale blue with a greek key fabric, but apparently I didn't take a picture of them.
then I changed the seat cushion to the Robert Allan Kiki Pinata fabric I used in the bookshelves on the other side of the room.
Unfortunately, the blue wasn't quite the color I wanted. I really wanted red, but someone was tired of painting, wanted to return the paint sprayer to the store, and sweet-talked me into leaving them the blue color because they looked so lovely. I grumpily acquiesced.
They did look lovely. Just not the lovely that I wanted.
So a few weeks later I grabbed some Killz primer, spraypainted it on, and then started painting them red. The primer bubbled and was very rough, and even though I sanded it down it could still be seen through the red.
I came up with the bright idea of stripping all eleventy-billion layers of paint off the chairs.
I will pause, while you all laugh at me.
I didn't want to use harsh caustic chemicals, so I did some research on the interwebs and found Citrustrip, which is a goopy neon orange paint stripper that doesn't smell. I will admit that it goes on nice and thick, not runny, and there is very little harsh chemical fumes. I put some on the chairs and then left it to do its magic. After about an hour, I came back out and started stripping.
Eh. It was coming off, but kind of slowly. I added another layer of Citrustrip, and left it out for a few hours.
Btw, I did this out on our back patio, which is a fenced in area on top of the garage, which get blazing hot sunlight all day long, with no shade.
That's right, I baked the Citrustrip right onto my chairs. Completely dried, clumpy, dusty layer of chemical peeler, completely adhered to my chairs.
See all that orangy crap? That's the dried out citrustrip.
I put them in the garage for a while. I was sick of working on them.
I decided last week that since I wasn't going to get my eleventy-billion things on my list done before the babysitter goes back to school, I would make the chairs my one project to complete. How to fix these things? I have zero desire to try and strip them again. I'll try sanding them.
I start sanding the chair. The baked on Citrustrip sands off into a dusty, flaky chemical mess. I'm sure this is great for my lungs. Worse, however, I realize, is that the little tiny edge detailing and the curviness of the chair means that the hand sander is way too large for the job. I can buy a dremel or a pointy sander or do it by hand.
And so, I am giving up on these chairs. They are going out to the curb. I is done. I am beyond sick of painting these chairs, since they take for-EVAH to do the shield. Done! Begone! Out damned spot!
Let the fun shopping of new chairs begin!
Thursday, July 15, 2010
the cornice board and dining chairs
Last night I made the cornice board for the living room window. Note to self, next time I make a 13 foot long cornice while kneeling on a marble floor, buy kneepads.
Remember the peach curtains?
Originally, I wanted to take down the peach monstrosity and put up a clean, simple brass curtain rod, like this one from Pottery Barn:
A few things stopped me. One, my inlaws like having the sheers in the window. Since the window is a little over thirteen feet long, that meant a curtain rod would need support brackets in two places in the middle of the window, thus making it impossible to fully open the sheers. Two, that curtain rod was over $200 (close to $250 after shipping). Three, that curtain rod was sold out, and 13 feet long is not exactly a standard size that you can buy in stores. Plus, even though brass is supposedly making a comeback, its not easy to find in big box stores yet. And four, a few years ago they had a leak in the roof, since repaired, but the ceiling and wall sustained a lot of damage. Its been fixed but the patch is still visible.
The other option was to use the hardware from the peach curtains.
It was a 13 foot long board with a very long track for the sheers, and shorter tracks on either side for the curtain panels. The board was attached to the wall with L brackets. And it was free. The only problem was that using the board would require making a cornice or a valance to hide the board. I was trying to get away from adding more fabric/pattern to the room, and 13 feet of cornice would be a pretty big piece of fabric.
I used Pottery Barn ivory dupioni silk curtains, and they only came in sizes up to 120 inches. To make the cornice was 157 inches, and using two of the same curtains to match the fabric would have required a seam. I didn't think that would look great, nor do I sew.
I turned to Fabric.com and looked in the dupioni silk section. Although they had an ivory dupioni, I was leery of trying to match the curtain. So I went with a fairly neutral gold-ish tan small check. It had a bit of sheen, a bit of roughness, was the same type of material, but was not a "look at me!!" floral or other pattern that would compete with all the other colors and patterns in the room. And I'm pretty happy with how it turned out.
Here's me making the cornice at 10 pm last night. I do everything after children are in bed.
I used the same cornice tutorial that I've used in the past (here and here) from Little Green Notebook. Its just using foam core board, wrapping it with batting, and stapling the fabric. Since the cornice was so long I affixed the sections with duct tape on the back, but clear packing tape on the front. I have learned from experience that duct tape will show through a lot of lighter fabrics.
This morning I recovered the dining seat cushions. I didn't have to kneel on the floor to do it, and my knees thanked me for that. Formerly burgundy striped:
Afterwards, a light peach and blue and beige floral:
Yes, I know, I said I was trying to stay away from more colorful florals. However, this had all of the right colors, matched the other side of the room, my inlaws LOVE florals, and---the kicker----it was $4.99 a yard in upholstery weight. Shabaam. Sold.
I've been kind of falling down on the blogging front, I've got a ton of stuff to blog. I've just been so busy trying to finish the room. My sister is clamoring for the pictures we took of my little girl and her new little girl together---J--you can have those pictures when you send me your guest blog post--bwahahaha...and a ton of other stuff.
Ok! I'm working on the big reveal post. Coming soon!
Remember the peach curtains?
Originally, I wanted to take down the peach monstrosity and put up a clean, simple brass curtain rod, like this one from Pottery Barn:
A few things stopped me. One, my inlaws like having the sheers in the window. Since the window is a little over thirteen feet long, that meant a curtain rod would need support brackets in two places in the middle of the window, thus making it impossible to fully open the sheers. Two, that curtain rod was over $200 (close to $250 after shipping). Three, that curtain rod was sold out, and 13 feet long is not exactly a standard size that you can buy in stores. Plus, even though brass is supposedly making a comeback, its not easy to find in big box stores yet. And four, a few years ago they had a leak in the roof, since repaired, but the ceiling and wall sustained a lot of damage. Its been fixed but the patch is still visible.
The other option was to use the hardware from the peach curtains.
It was a 13 foot long board with a very long track for the sheers, and shorter tracks on either side for the curtain panels. The board was attached to the wall with L brackets. And it was free. The only problem was that using the board would require making a cornice or a valance to hide the board. I was trying to get away from adding more fabric/pattern to the room, and 13 feet of cornice would be a pretty big piece of fabric.
I used Pottery Barn ivory dupioni silk curtains, and they only came in sizes up to 120 inches. To make the cornice was 157 inches, and using two of the same curtains to match the fabric would have required a seam. I didn't think that would look great, nor do I sew.
I turned to Fabric.com and looked in the dupioni silk section. Although they had an ivory dupioni, I was leery of trying to match the curtain. So I went with a fairly neutral gold-ish tan small check. It had a bit of sheen, a bit of roughness, was the same type of material, but was not a "look at me!!" floral or other pattern that would compete with all the other colors and patterns in the room. And I'm pretty happy with how it turned out.
Here's me making the cornice at 10 pm last night. I do everything after children are in bed.
I used the same cornice tutorial that I've used in the past (here and here) from Little Green Notebook. Its just using foam core board, wrapping it with batting, and stapling the fabric. Since the cornice was so long I affixed the sections with duct tape on the back, but clear packing tape on the front. I have learned from experience that duct tape will show through a lot of lighter fabrics.
This morning I recovered the dining seat cushions. I didn't have to kneel on the floor to do it, and my knees thanked me for that. Formerly burgundy striped:
Afterwards, a light peach and blue and beige floral:
Yes, I know, I said I was trying to stay away from more colorful florals. However, this had all of the right colors, matched the other side of the room, my inlaws LOVE florals, and---the kicker----it was $4.99 a yard in upholstery weight. Shabaam. Sold.
I've been kind of falling down on the blogging front, I've got a ton of stuff to blog. I've just been so busy trying to finish the room. My sister is clamoring for the pictures we took of my little girl and her new little girl together---J--you can have those pictures when you send me your guest blog post--bwahahaha...and a ton of other stuff.
Ok! I'm working on the big reveal post. Coming soon!
Subscribe to:
Posts (Atom)
