Friday, May 25, 2012

My mother suggested that I do a post on what my town looks like, for all the folks back home who would like to see where we live.  So, I give you pictures of Anonymous Town in Southern California.  Be warned, this will be 800 pictures of palm trees.

Here's a view of our development. Every single house looks exactly the same in its quasi-Mediterranean/Spanish-ish style.  But there is lots of greenery and it looks nice. (And palm trees!)


Most of the developments around here have a wall all the way around.  The towns where we lived in NJ, you could walk for miles and see so many houses and neighborhoods, and actually meet people. Here, you can see a wall.  Maybe some flowers in front of the wall if the HOA has a good landscaping budget.


Some of the flowers here are amazingly vibrant and have such intense hues.


We had some of these flowers in our yard, but our gardener (who I have zero control over, he came with the house) cut them all down because, and I quote, "the flowers are making too much shade so the grass can't grow."

I can't make this up.  Its dark right now or I'd go outside and take a picture of the hacked up bush.

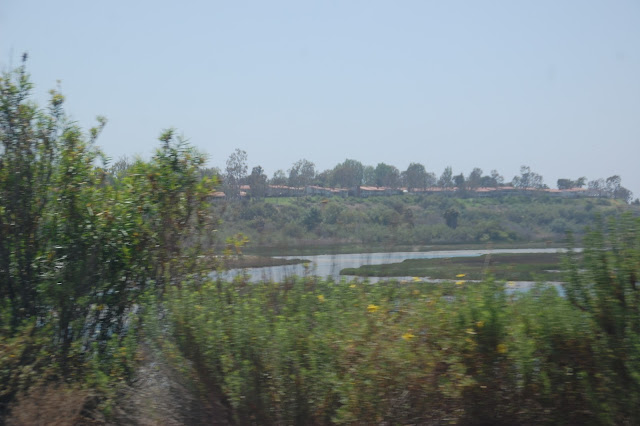
We walk across a huge field to get to Greg's school.


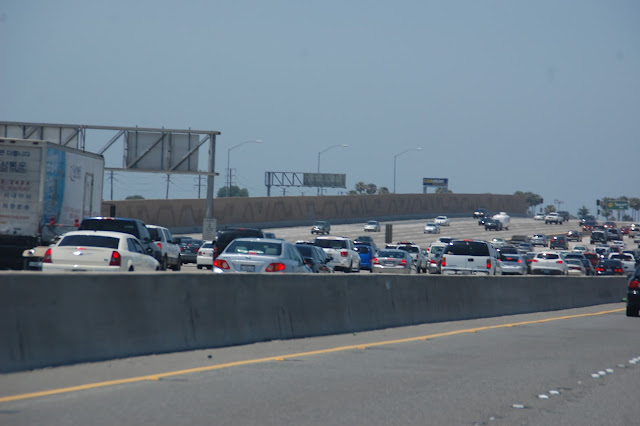
There are lots of highways here.  Also, traffic.


It has been very hazy here, but on a clear day, this mountain is massive.


Around town (palm trees!):


I spend lots of time at Lowes.  (Admiring the palm trees.)


I spend even more time at Target. (Palm trees!)  Despite the palm trees, this Target is laid out exactly like the ones in NJ, so its just like being at home.


School, Target, Lowes, home...that about covers where I spend most of my time.  Its a bland plastic pleasant place to live.  Other stuff you'd like to see? (MOAR PALM TREES??)

**********
In other news, my two year blogging anniversary is coming up on June 5th. Any deep, burning questions you want answered?  Things you absolutely must know about me?  If I get more than three questions I'll answer them in a post on June 5th.

Thursday, May 24, 2012

William Morris: jewelry edition (I pity the fool!)

Today I was at Ikea when I saw a corkboard for $6 and thought, aha! William Morris project!

In our last house, I bought some silverware organizers and used them to organize my jewelry in the top drawer of my dresser.  When we moved, I wrapped the silverware organizers in saranwrap and packed them in a bin.  Flash forward two months, my silverware organizers are still wrapped in saranwrap (it was a lot of saranwrap).


I hung the corkboard in my walk in closet.  I had a choice between hanging low, where I could reach them, but so could the Princess, or hanging high, where the Princess couldn't reach but neither could I.  I went with high.


I used thumbtacks in the corkboard to hang my necklaces.


In looking at this, I see that I have a lot of aqua and red jewelry.   I am also fond of glass necklaces.

I weeded out some of the stuff that I no longer wear or like.  The one necklace remaining that I am unsure of is the gold link chain.  A former colleague had a similar necklace, and I liked it so much on her that I went and bought one too.  I don't like it quite as much on me.

I was lecturing my husband when he took this picture, thus my face has that lecturing expression. 

I fear that I look like Mr. T when I wear it.

Keep it? Let Princess play with it?  Wear it with four more gold chains?

I'm linking up to Pancakes and French Fries' William Morris Project.


Wednesday, May 23, 2012

progress in the boys' room

Last we saw the boys' room, it looked like this:

Those crooked stripes on the right drive me nuts.

I had thought up a number of possible moodboards, and was undecided which way to go.  This weekend I took down the blue striped curtains and thumbtacked them to the wall, to simulate the moodboard where I had them framed and hung behind the beds.


It felt really busy. It wasn't quite what I wanted.

My sister asked me to buy some of these trellis curtains for her nursery and bring them with me on my next trip home.  I bought them a few days ago...and they looked so nice....and I was considering them for the boys' room anyways....so I took them out of the package and put them up, just to see how they looked (with sister's permission, of course).


They look lovely, dontcha think?  I think so.  I think they are staying.  I went back to ZGallerie and bought another set for sister.

Tuesday, May 22, 2012

abstract art, take two

On my list of things to do in the master bedroom is find art for over the dresser.  


Since the vaulted wall is nearly sixteen feet high, I was looking for a large piece of art.  Unfortunately, large pieces of original art that I like generally run thousands of dollars. Even mass produced art that size is still upwards of $500.  

I thought perhaps the kids and I could try our hand at an abstract piece of art.  I bought a 48 x 48 inch canvas at Michaels with a 40% off coupon, and some acrylic paints.  I painted the canvas with two coats of gesso first.  Gesso is just a thick white paint that puts down a protective base so that the canvas doesn't soak up the paint.  On top of that I painted the entire canvas Valspar's Wink Pink.  

You can see the first attempt here.  I let the kids go to town with foam sponge brushes.  It looked like I had let the kids go to town with foam sponge brushes.  It wasn't quite what I wanted, and the colors weren't quite right.

For the second attempt, I painted the canvas Wink Pink again. I bought some ketchup-type squeeze bottles, put about a teaspoon of paint inside, thinned it out with water, and squeezed the paint over the canvas a la Jackson Pollack. 


For this painting I focused on pinks and corals and oranges, with a wee bit of green and blue.  At the end I thinned out some shiny gold craft paint and dripped that over it, then misted a slight coat of gold spraypaint over it.


The best part of this art is the cost.  I bought the canvas with a thick edge, although you can get a canvas with the thin edge for about a third less.  I used a 40% off coupon, so the canvas was about $50, and I bought about $20 worth of acrylic paint, a $13 quart of Wink Pink, and six squeeze bottles for $10.  So the cost of this piece of art was about $93.  If you used a thinner canvas and craft paint, you could do it for under $50. 

I also spraypainted my formerly navy blue jewelry box the same green as the lamps.


I know what you're thinking--these curtains would look perfect with this room, right?  Funny, I was thinking the same thing! 

Master bedroom to-do list
White night stands (one and two)
Pictures over night stands
Small mirror over night stands
New lamp shades
Patterned pillow shams
Art or mirror over dresser
Larger lamp for dresser
Art next to window
Pictures in hallway
New bedskirt


Saturday, May 19, 2012

There's a reason abstract art costs $$$$.

Its harder than it looks, yo.


Greg, ever the optimist, painted for a few moments, stepped back, cocked his head and said "I don't think this painting is going to look very good."

He's right.  Back to the drawing board.  

Thursday, May 17, 2012

pippa overlays on a malm dresser

I bought a Malm three drawer dresser for a night table on my side of the bed.  I like the modern, simple lines, and I've wanted to use O'verlays ever since Danika announced on her blog she was making them.  I ordered the Pippa kit 3 set.

And they are fabulous.


I primed them with Zinsser 1-2-3 primer, then spraypainted them gold.  I hot glued them onto the Malm front.  Luckily hot glue comes off without leaving a mark, because it took me a few tries to get them even.

Crossing stuff off the master bedroom to-do list left and right!


White night stands (one and two)
Pictures over night stands
Small mirror over night stands
New lamp shades
Patterned pillow shams
Art or mirror over dresser
Larger lamp for dresser
Art next to window
Pictures in hallway
New bedskirt

Wednesday, May 16, 2012

painted bedroom lamps

A few weeks ago I found these two lamps at a home consignment store.  I loved the shape, but the black wasn't right for my bedroom.


So I painted them.


Because one night table is about two inches shorter than the other, the Mister's lamp sits on a tray to even  out the heights.


I am about 95% happy with how these lamps turned out.  I don't like the lampshade, but they will be replaced eventually.  What did not turn out as I had hoped, however, was the glossy finish.


I started with priming the lamps.  I used Zinsser 1-2-3 spray primer, which worked fabulously.  I liked it much better than the Killz primer, which I find very bubbly.  Then I painted about four coats of Rustoleum "no name" green.  (There is no color name on the bottle.)  Then I tried three coats of Krylon Clear Gloss.  That was total crap.  It did not make the surface glossy in the least.

I remembered that Janelle at Isabelle and Max Rooms had made over some lamps with a glossy finish, so I went to four stores to find the Rustoleum 2X Gloss Clear that she had used.  I lightly sanded the lamps again, tried three coats of the Rustoleum Clear, and yet again, no glossy finish.  Since we were without lamps in the bedroom for at least ten days at that point, I gave up.  The lamps are sorta shiny but hardly have a glossy finish.

Regardless, I am pretty happy with the color.  Perhaps finding a fabulous new lampshade will take my mind off the lack of gloss.

That's one more thing off my bedroom list.


White upholstered headboard
White night stands
Pictures over night stands
Small mirror over night stands
Paint gourd lamps
New lamp shades
Patterned pillow shams
Art or mirror over dresser
Larger lamp for dresser
Art next to window
Pictures in hallway
New bedskirt


Tuesday, May 15, 2012

tableskirt over shoe cubby

We have come to a point where there are too many shoes cluttering up our foyer. I tried storing them in the bottom drawer of the blue dresser, but there are just too many.  I moved my grandma chair to another spot and put in two shoe cubbies from Target.  Although useful, they are not terribly pretty.

My mother is visiting, so I put her to work sewing a table skirt for the cubbies.  We used this cross section fabric that I had on hand, and trimmed it with green ribbon.


We used this tutorial (well, my mother did, I just did lots of ironing and pinning). We used two panels in the front to allow the kids easy access to the shoes.


I would like to add some frog closures to the front, if I can find some that match.


Monday, May 14, 2012

Mother's Day

I had a lovely Mother's Day, how about you?

My mother is visiting, and she is an accomplished seamstress.  So I put her to work sewing lots of things. Like these pretty pillows.


Back to your oar, Mother.


The kids and I did a painting project that I can't wait to share. No, that's not ketchup and mustard on my feet. I think making art with the kids may be a new Mother's Day tradition.


I fell off the no-sugar bandwagon---nay, I jumped off and faceplanted into a pan of delicious carmelitas:


We also attempted some lemon bars, but they didn't come out right, and Greg said "do we have to eat the lemon juice cake?"  Which was a fairly accurate assessment.


Monday I will climb back on the no-sugar train, but there are a few hours before midnight and half a pan of carmelitas calling my name.


Hope you all had a Happy Mother's Day!